Friday, February 10, 2012

5 years later . . .

When Jackson (our 5 year old) was an infant, I saw somewhere the cutest idea of melting broken crayons into heart shapes for Valentines. I bought the molds way back then, but we had no classmates to make valentines for until last year. We tried to make them last year, but we used cheap Dollar store crayons so they did not color well. Also, I guess my mold was not 100% silicone - be sure to use a mold made for baking in - I had to throw mine away after we were done.


This year we made them with our broken Crayola's, and they turned out much better (except the colors since we only used broken crayons). Jackson also wanted to give his classmates the Star Wars valentines that he picked out, so I suggested we make little envelopes to put them in and stick the heart crayon on the outside of the envelope.


I read a couple of blogs that suggested using double sided sticky foam squares to stick the crayons on the paper, but the crayons were too waxy - it was a waste of $4. I ended up using a hot glue gun - it melted the back of the crayon heart just enough that it bonded to the hot glue & the paper.


We used Star Wars stickers on the back to seal the little envelopes - I think they turned out pretty cute.

Wednesday, February 8, 2012

Sally Hansen Salon Effects


Sally Hansen Salon Effects - I LOVE these! This is my second set - I just took the first ones off this morning after 19 days on my fingers. They held up really well, but my nails were growing so much that they started to look funny. They are a film of actual nail polish that you smooth onto your nails. They are not fake nails & they are not stickers. They are the best thing I have used so far. I do recommend a good clear topcoat over them, though. They come off with regular nail polish remover. When you take them off you can see that they are printed nail polish film. I would love to be able to personalize a set of these - your own printed designs - I wonder if that will ever be possible???

Fun with Instagram


Just thought this was a fun picture - taken at Chili's while waiting to be seated

I can copy anything


I have decided that I am not all that creative on my own, but show me something cool and I can figure out how to copy it - after all, they always say that imitation is the best form of flattery, right? Here is another amazing idea I got from Pinterest. The cables & clips are from Ikea & I cut out the vinyl lettering on my Silhouette digital cutting machine. This is the perfect way for us to display our kids' art since we have a stainless steel fridge but a big hallway ;)

Thursday, February 2, 2012

I've always wanted a photo wall like this

I have always wanted to have a wall in the hallway of my home to display family photos in a "collage" sort of way. At our first house I tried to just start hanging frames in a random order all over the wall, using only one nail in the center of each frame, and it always looked messy. At our second house, I resorted to a picture rail in the hall, but it collected too much dust.

At our new home, I wanted to do it the right way! So what did I do? I sat on 
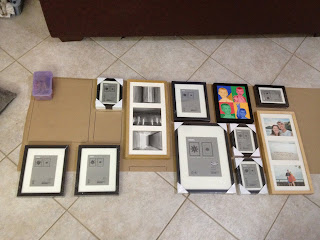
Pinterest all night, ha ha! I was actually more than one night, and over the course of a couple of days, I planned out what I would do. We decided to get all of the frames from Ikea so they would all match, & it would be easier to hang them since the frames were all the same thickness.

I copied a couple of tutorials I saw where they used butcher paper to lay out off of the frames, trace them, and mark where the nails holes should go.


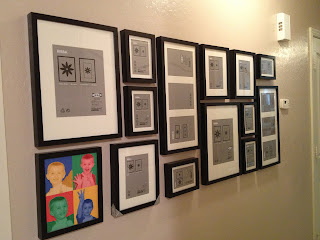
Then, we hung the butcher paper level on the wall with masking tape (a two-person job), and started pounding the nails in. I decided that I did not want these frames tilting all over the place like at our first home, so I put two nails at the top of each frame to keep the level. Also, be sure your nails are angled into the wall, so the frames do not slide off if a door is slammed a bit too hard (I'm speaking from experience). Once the nails are all in, you can carefully remove the butcher paper & start hanging your frames.


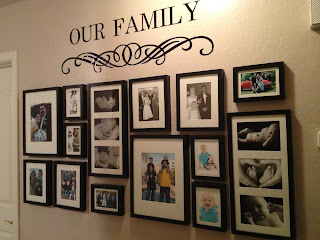
After I chose my photos for the frames, I felt like it was missing something. I have a Silhouette digital cutting machine, and I have seen a lot of cool inspirational wall art sayings cut out of adhesive-backed vinyl. I could not find one in particular that I liked, so I purchased the scroll design for $0.99 from the Silhouette online store, made it larger to fit the wall, and added the words.


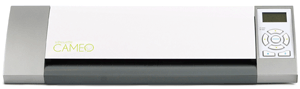
I got a really good deal on my Silhouette from craigslist, and I am really glad that I got that particular digital cutter. It hooks to your computer when it cuts, and the designs are cheap. There ae no cartridges to buy, and you can just buy what you want when you want it from home. It also came with a $25 download card for designs. I have had the machine for over a year, and I still have not used up the $25. It also come with it's own software that is easy to use. If you want to create your own more intricate designs or company logos, there is a plug-in to cut straight from Adobe Illustrator, which I have used a lot! I have the old 8" wide machine, but their new "cameo" cuts up to 12" for scrapbooking.